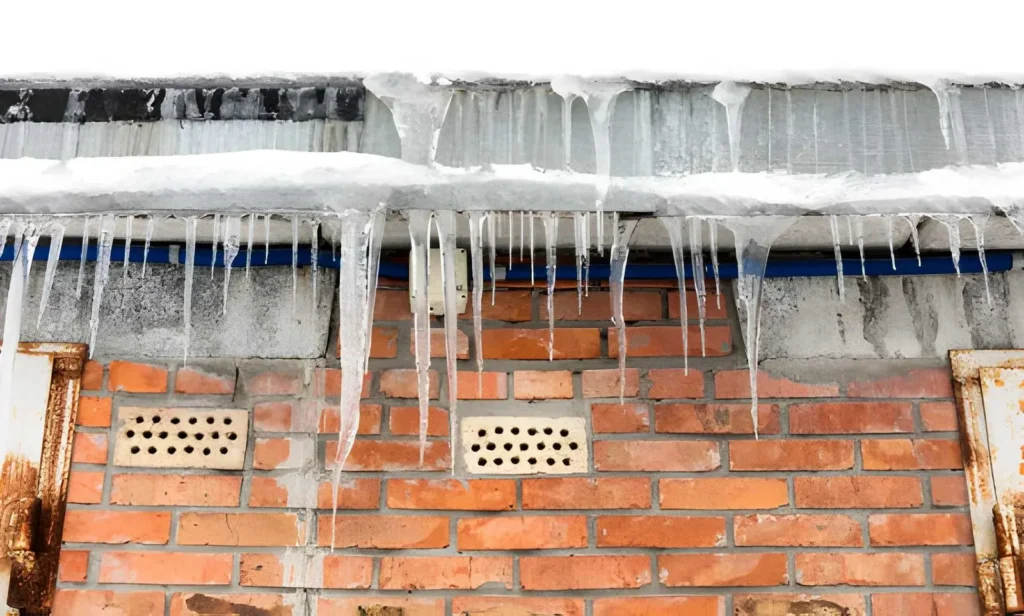

A snow-covered roof can look peaceful while hiding an expensive problem. When melting snow refreezes near the eaves, it can form a ridge of ice that traps additional water. That water may move under vulnerable roofing materials and eventually reach ceilings, walls, and insulation. Homeowners often notice stained paint or dripping water only after the damage has begun. Fortunately, prevention usually starts well before the first heavy snowfall. Understanding roof temperatures, attic heat leakage, and safe winter maintenance can help protect the property. Instead of relying on quick fixes at the roof edge, focus on the conditions that allow ice dams to develop.
Why Ice Dams Form on a Snowy Roof
Ice dams result from uneven temperatures across the roof surface. Warmth escaping from the living space, heat-producing equipment, or solar exposure can melt snow on the upper roof. The water then flows down toward the colder overhang, where it refreezes. Over time, a ridge develops and holds back more meltwater. Because many steep roofs use water-shedding coverings rather than fully waterproof surface layers, backed-up water may enter beneath shingles. The U.S. Department of Energy’s guidance on ice dams connects the problem with roof temperature differences and attic conditions. The key lesson is that removing visible ice does not necessarily eliminate the cause.
Recognize the Warning Signs Early
Look for pronounced ice ridges along the eaves, repeated melt-and-freeze patterns, or water staining on ceilings near exterior walls. Large icicles can indicate melting activity, although they do not prove an ice dam is present. In the attic, damp sheathing, frost, discolored insulation, or a musty smell deserve investigation. Document when and where the symptoms appear, especially after periods of snow followed by daytime warming and nighttime freezing. If water is already entering the house, protect belongings and contact a qualified roofing professional. Avoid standing below hanging ice, which can fall unexpectedly and cause injury.
Seal Warm-Air Leaks Before Adding Insulation
Warm indoor air can reach the attic through gaps around ceiling fixtures, wiring, plumbing openings, attic hatches, and wall connections. Because moving air carries both heat and moisture, these leaks can undermine otherwise substantial insulation. Begin with a professional inspection or carefully planned air-sealing assessment. Suitable sealants and weatherstripping may address ordinary gaps, but areas near chimneys, recessed lights, or other heat-producing components require approved fire-safe details. Make sure bathroom fans and dryer vents discharge outdoors rather than into the attic. The Department of Energy’s air-sealing guide explains why closing hidden leakage paths matters. Proper air sealing often provides a more durable result than simply adding insulation over unresolved gaps.
Check Attic Insulation for Gaps and Compression
Insulation limits heat transfer from occupied rooms into the roof assembly. Yet uneven coverage, compressed material, and missing sections can create warm areas. Pay special attention to attic access openings, spaces above exterior walls, and areas around penetrations. An insulation contractor can assess the existing material and recommend appropriate levels for the climate and construction. Do not pack insulation into ventilation channels or cover fixtures that require clearance. Likewise, protect ducts and other building services according to their specific installation requirements. Good insulation works best as part of a continuous thermal boundary combined with effective air sealing.
Keep Required Ventilation Paths Clear
Many roofs use a vented attic design, with intake openings near the soffits and exhaust openings higher on the roof. These pathways help manage attic conditions when they are properly designed and unobstructed. However, insulation, stored items, or debris may block the flow of air. Check vent screens and baffles, and ask a roofing specialist to investigate questionable arrangements. Importantly, not every house requires the same ventilation approach; correctly designed unvented assemblies follow different principles. Adding vents without understanding the roof system can create new problems. The objective is to preserve the intended building assembly, not to maximize the number of openings.
Inspect Roof Edges and Water-Resistant Details
Even a well-insulated house may face severe freeze-thaw weather. Therefore, roof-edge protection offers an additional line of defense. During roof replacement, contractors can assess whether local requirements call for self-adhered ice-and-water membrane beneath the roofing around vulnerable eaves. Flashing, drip edges, and transitions should also direct water away from the roof structure. The Department of Energy’s cold-climate eaves guidance describes how roof-edge membranes help limit infiltration when water backs up. These materials do not cure inadequate air sealing, but they can reduce the consequences of an occasional ice dam.
Manage Snow Without Taking Dangerous Risks
Heavy snow accumulation can supply the water that feeds ice dams. Some homeowners use a roof rake from the ground to clear snow near the eaves, provided the tool and roof conditions permit safe operation. However, reaching across electrical lines, standing beneath unstable ice, or working from icy ladders creates serious hazards. Never chip ice with an axe or sharp metal tool; these methods can damage roofing and injure the person doing the work. Avoid pouring hot water across a frozen roof because it may refreeze and create slippery conditions. When buildup is substantial or access is difficult, hire trained professionals using methods suitable for the roof.
Do Not Overlook Gutters and Downspouts
Blocked gutters can worsen winter drainage problems, although clean gutters alone cannot prevent ice dams caused by heat escaping through a roof. Remove leaves and debris before freezing weather when it is safe to do so. Check that downspouts discharge away from the foundation and that gutter attachments remain secure. Be cautious about assuming a gutter guard solves every winter issue; snow and ice conditions still depend on the roof and climate. An overall drainage review should include roof valleys, flashing, and locations where melting snow may collect.
Understand the Limits of Heat Cables
Roof heat cables are sometimes installed to create narrow drainage paths through ice. In selected situations they may help manage recurring accumulation, but they consume electricity, need careful installation, and do not address the underlying temperature imbalance. Improper products or installation can create safety and durability issues. Before using them, have a qualified professional investigate insulation, air leakage, drainage, and roof construction. Treat cables as a targeted measure where justified, not the default answer for every snowy roof.
Create a Prewinter Inspection Routine
Schedule an attic and roof review before temperatures fall. Confirm that exhaust ducts terminate outdoors, attic access panels seal properly, ventilation paths stay open, and insulation remains consistent. Inspect roof coverings and flashing from a safe vantage point. Keep photographs and repair receipts so a contractor can recognize recurring trouble spots. After major storms, check ceilings and upper walls for new staining. If a leak occurs, prompt diagnosis can limit damage to finishes, framing, and insulation. During a future roof replacement, ask whether improved membrane details or envelope upgrades would be worthwhile.
Conclusion
Ice dams are visible symptoms of a temperature and moisture-management problem. Lasting prevention usually combines attic air sealing, suitable insulation, correct roof-assembly design, and appropriate edge protection. By preparing before winter and avoiding dangerous ice-removal shortcuts, homeowners can lower the likelihood of water intrusion and costly seasonal repairs.
Also Read
- Synonyms for Via 30 Powerful Words to Explore 2026
- Synonyms of Complacent,30 Best word for 2026
- What Is a Synonym for Also? 15 Useful Alternatives